
Baking bread is my favorite,
the kneading process is very calming and meditative for me.
But as my work gets busier, I find I don’t have time to make homemade bread.

Through trial and error, this Frying Pan Bread was born!
This recipe minimizes time and effort and can be made in just one frying pan.

A super quick and delicious way to make soft homemade bread.

When making this bread; It is important to use a non-stick pan with a thick base, otherwise the dough will stick to the bottom of the pan.
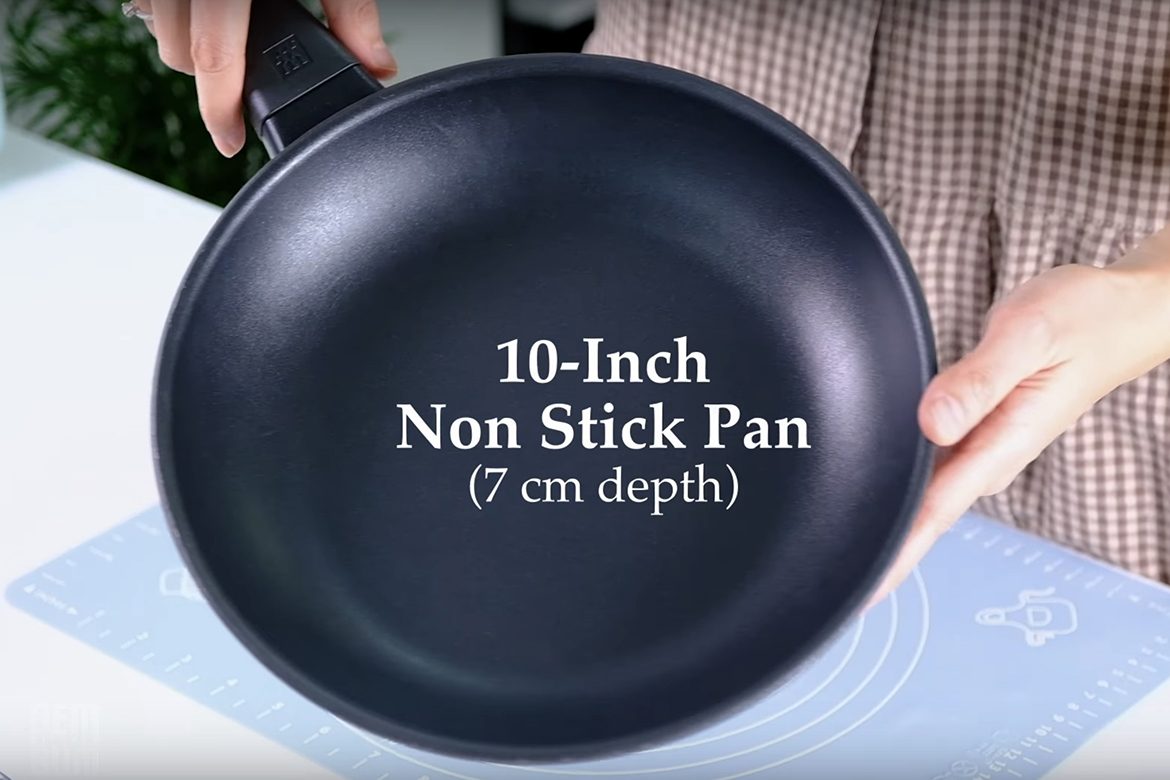
If you are using an induction, please use a special frying pan
The pan lid is also essential; It use to prevent the bread from drying out during fermentation and cooking.

I use Full Cream Powdered Milk, not Liquid Milk in this recipe.
The fat from Milk Powder adds rich flavor and tenderizes the dough, resulting in a softer, finer, more tender crumb.
The bread will also have a longer shelf life.

The bread is so soft and fluffy; perfect served with Butter or jam, or as a delicious accompaniment to a bowl of warm soup.

I love making it into sandwiches 😁

I hope this recipe helps those of you who are busy; The simplest and most delicious homemade bread.

Make it for your loved ones; Give them freshly baked, healthy bread 🥰
LOVE YOU ALL!!
WATCH HOW TO MAKE FRYING PAN MILK BREAD
TIPS FOR SUCCESS (PLEASE READ FIRST):
- Use a heavy bottom non-stick pan, otherwise the dough will stick to the bottom of the pan
- The pan lid is also essential; It use to prevent the bread from drying out during fermentation and cooking
- You can use either gas stove or an Induction cooktop to cook the bread (if you are using an Induction, please use a special frying pan)
- The optimal size for the dough volume is 20 cm in diameter and 5 to 7 cm in depth (make sure your pan is large enough to accommodate the dough; I am using 10-Inch Frying Pan)
- Choose “STRONG” Bread Flour for best result
- Use Full Cream Powdered Milk instead of Liquid Milk
- The water should be lukewarm; roughly matching body temperature, which is about 35°C to 37°C (this is the ideal range for activating yeast effectively)
AVOID water that is too HOT, as this can kill the yeast - Follow the steps carefully, don’t skip any proofing time
- While cooking bread DON’T use HIGH heat
Please note: Stove temperatures vary, the correct temperature is determined by trial and error (you may need to experiment until you find the right temperature for your stove)
If the temperature is too high, the surface of the bread will burn; Conversely, if it’s too low, the interior of the bread will be undercooked - Don’t forget to cover the pan when cooking
Covering the pan and cooking slowly over medium-low heat, the water content in the dough will be locked in, resulting in soft, moist bread - Once done, place the bread on a cooling rack to cool completely before storing (by allowing excess moisture to escape and the structure to set, cooling helps the bread stay fresh longer)
recipe
FRYING PAN MILK BREAD
Yield: One 20 cm diameter (5 cm thick)
🍞 INGREDIENTS
15 g Unsalted Butter (melted)
200 g Strong Bread Flour
30 g Caster Sugar
3 g Salt
150 g Water (lukewarm ~ 35-37°C)
15 g Full Cream Milk Powder
3 g Instant Yeast
INSTRUCTIONS
- Melt the Unsalted Butter in a double boiler, set aside
- For the dry ingredients, mix Bread Flour with Sugar and Salt; set aside
- In another bowl, mix Water with Milk Powder, stir well
Add the Instant Yeast and stir again; set aside - To make the dough
Place the dry ingredients to the pan
Pour in the Milk and melted Butter mixture
Using a spatula stir thoroughly until comes together, then place the lid and let it sit for 10 minutes - After 10 Minutes
Sprinkle a thin layer of flour and knead the dough with your fingertips for 1 Minute (you can feel the dough gradually becoming less sticky) - Then form the dough into a ball (you can add little flour to your palms to prevent sticking)
Place the dough in the center of the pan with the smooth side facing up, cover and let it sit at room temperature for about 30 minutes - After 30 minutes (you will see the dough has risen to about 1.8 times its original size)
Sprinkle the dough surface with a little flour; gently press the dough to release the gas and flatten it into a round disc shape (approximately 18 cm in diameter)
Then, cover the pan again and leave at room temperature for about 30 minutes for the final rise - 30 minutes later
The dough looks puffed up and bigger in size (it’s time to cook the dough) - Over MEDIUM heat, cover and cook the dough for about 7 minutes (I use medium heat or level 5 on my induction stove)
* Please note that stove temperatures vary, the correct temperature is determined by trial and error; You may need to experiment until you find the right temperature for your stove - After 7 minutes
Once the bottom is brown and the spatula can be inserted easily, gently flip the bread then immediately reduce the heat to MEDIUM-LOW (I use level 4 on my Induction stove)
Cover again and continue cooking for 7 minutes - 7 minutes later
Finally turn it over and cook again for 1 minute - Once it’s done, place the bread on a cooling rack to cool completely before storing or you can serve while still warm
notes
- The bread will stay soft and can be stored at room temperature in an airtight container for up to 3 days
- In the refrigerator, Milk Bread can last for up to a week (in an airtight container)
- To Freeze
Place the slices in freezer-safe bags, removing as much air as possible before sealing. Store the bread in the freezer, preferably in the coldest part, for up to 1 month - To reheat
From the fridge: wrap the bread in foil and bake at 350°F (177°C) for 10-15 minutes
From the freezer: thaw frozen bread on the counter for 1-2 hours or in the fridge overnight; then wrap the bread in foil and bake at 350°F (177°C) for 10-15 minutes
