
Hi Guys, have you ever tried making icebox cookies? The cookie dough is shaped into a specific design, freeze until firm, then sliced and baked.
Yes you need to plan well for these and it is a little complicated task, but it’s a lot of fun making these! They also not overly sweet, hold their shape and bake up perfect every single time.

This shortening based cookie recipe is easy to make, it doesn’t require any dough chilling, easy to work with (as it’s melting point is higher than butter), so it doesn’t soften as quickly while you handle it.

You will need some food colouring to dye your cookie dough. Try to use natural dyes as much as possible such as cocoa powder for brown, beetroot for pink or matcha powder for green colour.

And while this dough doesn’t technically have to be chilled, chilling it can make it easier to cut out more intricate shapes and transfer them to your baking sheet.

Slicing the first piece is always so exciting! I get a little nervous, too 😥.
Look at that awwwwww!!! 🤣😱🤗

Don’t forget to chill the cookies in the fridge for about 30 minutes before baking to maintain the details, and don’t forget rotating your pans halfway through baking.
When bake, leave at least 1-inch of spare in between the cookies, the dough won’t spread but will puff a bit.

Don’t throw the dough scraps, you can definitely reuse it. Roll and cut them with your favorite cookie cutter, I love to shape them with this tiny flower shape tart mould as a decoration.

The baking time will vary depending on the size, bake the cookies until the the bottom edges are just lightly browned. We don’t want overcooked the cookies as the colour detail is really crucial.
When take out from the oven,cool them on the baking sheets for 5 to 10 minutes and then transfer to a wire rack to finish cooling.

And for the details and outline, I choose royal icing coz it sets a little bit harder and it’s pretty simple.
Royal icing is all about consistency, so depending on how you want to decorate yours, for example, this cookies I will go with the thicker consistency for more of lining things out.
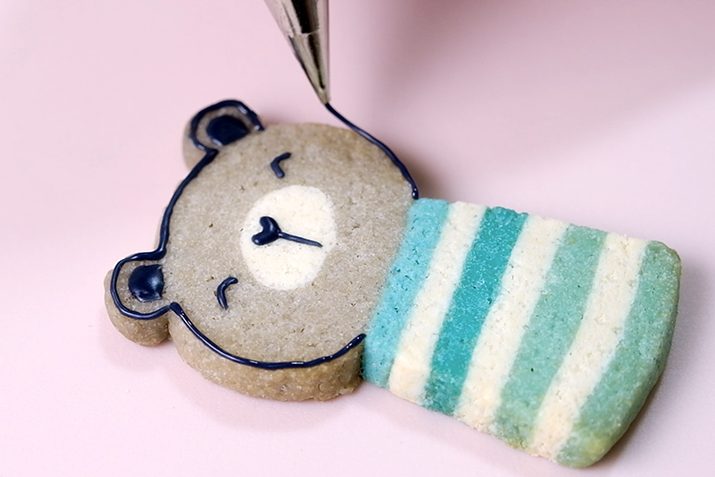
I suggest to use no. 1 round noozle for this delicate details and you can use small damp brush to correct the details.

Arh…SUPER cute!

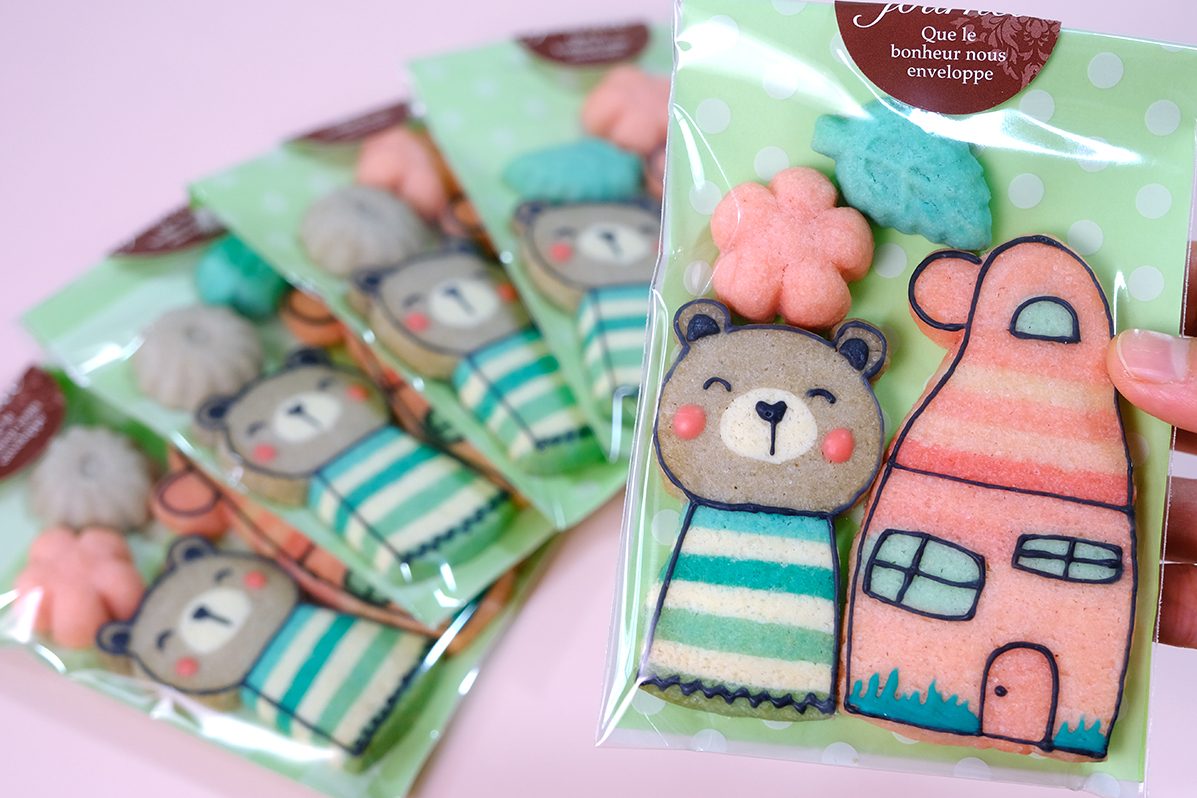
Around these holiday season, is there anything more iconic than these cute doodle icebox cookies?

You can make many people smile with these cookies!
They are perfect for casual gifts for your friends. Wrap them into a beautiful box or maybe in a homemade bag, like this.
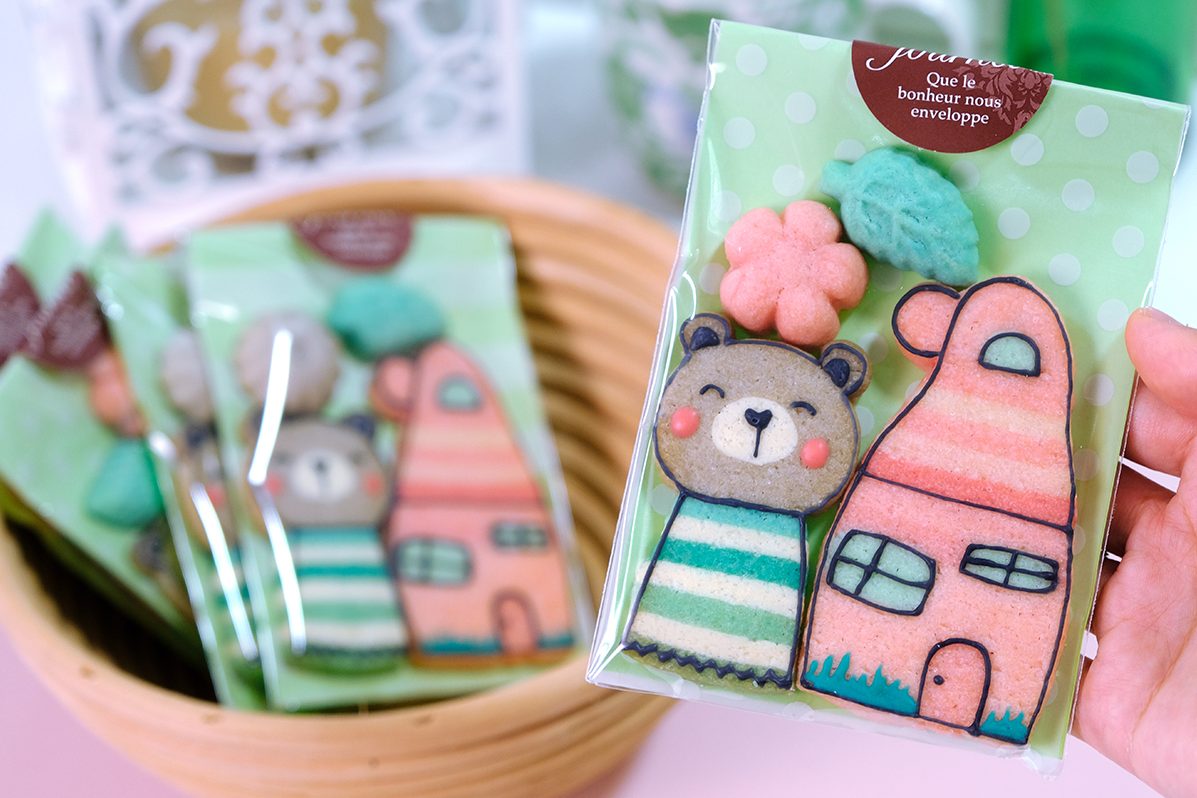
The cookies are crispy on the outside, not overly sweet and not too hard in the inside.
Hmm.mmm so yummy !!!
These cookie may be stored in an airtight container at room temperature for up to one week.

I hope that you enjoy the recipe and have some beautiful moments with your family in this lovely season!
💗 LOVE YOU ALL💞
DOODLE ICEBOX COOKIE
Yield: 24 pieces
Active time: 3 1/2 hours
Total time: 6 hours
🌿 Cookie Dough
170 g Shortening
200 g Granulated Sugar
50 g Whole Eggs
2 tbs Milk
1/2 tsp Almond Extract
380 g All-Purpose Flour
2 tsp Double Acting Baking Powder
1/2 tsp Salt
Food Colouring (Pink, Turquoise, White, Brown)
🌿 Royal Icing
120 g Icing Sugar
3 tsp Milk
1 tsp Light Corn Syrup or Honey
1/4 tsp Almond Extract
Food Colouring (Black, Pink, Turquoise)
INSTRUCTIONS
🌿 Cookie Dough
- Cream the shortening and sugar together until well combined for about 3 minutes (there are gonna be much fluffier when you’re done).
- Add in the eggs, along with milk and extract. Mix until all that liquid is well incorporated into the butter and sugar.
- Add the sifted dry ingredients; the all-purpose flour, baking powder and salt. Mix well (the mixture will be a little bit crumbly at first, but keep mixing and it will come together just fine). Note: To get a flakey and snappy cookies, don’t overwork this mixture; you’re kind of just incorporating the flour.
- This cookie dough is ready to use (it doesn’t require any dough chilling), colour your cookie dough and to shape it ~ kindly follow instructions according to the video.
- Store the completed cookies in the freezer for at least 30 minutes.
- Cut the frozen cookies for about 5 mm thick (make sure that you use a very sharp knife), place it on a baking try and then store them in the fridge for 30 minutes before baking (to maintain the details).
- Bake them in the preheated 160°C oven (baking time will vary depending on the size); and don’t forget rotating your pans halfway through baking.
* Bake the cookies until the the bottom edges are just lightly browned (don’t overcooked the cookies as the colour detail is really crucial). - When take out from the oven,cool them on the baking sheets for 5 to 10 minutes and then transfer to a wire rack to finish cooling.
🌿 Royal Icing
- Simply combine all the ingredients together. You do wanna work a little bit quickly with royal icing coz it will sets hard or else cover it with clingwrap.
*Note: If it’s too runny, add some icing sugar and if it’s too thick, add the amount of milk 1/4 teaspoon at a time until you reach the desire consistency. - Colour it, transfer to a piping bag and then draw the outline . Use a damp brush to correct the details.
🌿 Notes
Baked cookies may be stored in an airtight container at room temperature for up to 1 week. Make sure to let the icing fully harden before stacking the cookies. It also freeze well for up to 3 months, thaw to room temperature before serving.
